

Supplies:
2 part resin, I use Envirotex Lite (Got it at Michaels)
A container to mix the resin in (it will not be usable for anything else afterwards)
Something to stir with, I like popcicle sticks because they are cheap.
Sprinkles
Molds (I use silicon ice cube trays)
Glue such as e600
A necklace bail
a necklace of sorts
An empty box
a straw
Most importantly a warm work area!
 First mix your resin according to the directions. Mine takes two equal parts mixed well. I like to mix small amount at a time to be sure it doesn't set up too quickly on me.
2 part resin, I use Envirotex Lite (Got it at Michaels)
A container to mix the resin in (it will not be usable for anything else afterwards)
Something to stir with, I like popcicle sticks because they are cheap.
Sprinkles
Molds (I use silicon ice cube trays)
Glue such as e600
A necklace bail
a necklace of sorts
An empty box
a straw
Most importantly a warm work area!


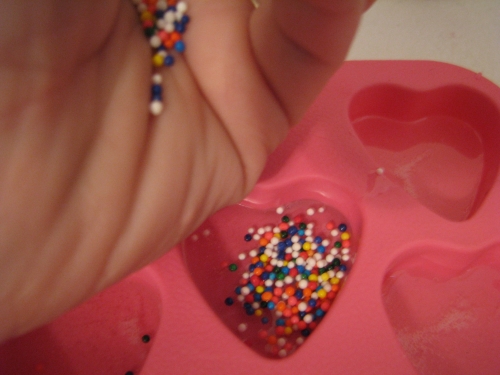


Pour resin over the top of the sprinkles. You don't need to totally fill the mold. but you want to be sure they sprinkles are covered.


Cover the mold with a box for 5-10 minutes. The box keeps the wet resin protected from dust, little fingers, etc.
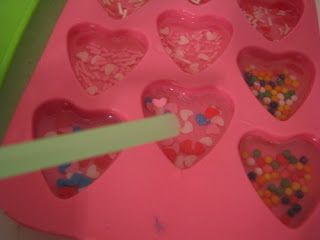 Come back to your molds and check them, many times bubbles form on the surface. Take your straw and lightly blow on the surface of the resin. The bubbles should start to pop. If you have larger ones that wont pop with the straw, use a pin to pop them.


 Now set the mold back under the box and leave it alone until tomorrow! Now be sure your work area is warm. If it it so cool the resin will not set clear, it will be foggy. My resin instructions recommend the temperature being between 70 and 80 degrees.
 Day 2!
We are going to first pop the resin from the molds.


They should look something like this.


 If you have some jagged edges or some wispy edges, just take a low grit sand paper to those areas.
 Put a dab of glue onto your bail.
 Attach the bail to the back of your resin.


 Once dry place the pendant onto your necklace.
 There you have it! a fun and funky necklace!!


Cover the mold with a box for 5-10 minutes. The box keeps the wet resin protected from dust, little fingers, etc.


 Now set the mold back under the box and leave it alone until tomorrow! Now be sure your work area is warm. If it it so cool the resin will not set clear, it will be foggy. My resin instructions recommend the temperature being between 70 and 80 degrees.
We are going to first pop the resin from the molds.


They should look something like this.


 There you have it! a fun and funky necklace!!


2 comments:
This is an awesome tutorial! I've been looking into making these resin pendants for awhile, and I finally sat down to do it tonight, with the help of this post. I'm dying to go prod the still-wet pendants, but so far I've resisted temptation and just might make it till tomorrow!
That's great! I hope they came out just as you'd hoped. :)
Post a Comment