Friday, February 11, 2011

Sweet As Steel Etsy Launch This Monday!

Sweet As Steels new etsy shop will launch Monday, Feb. 14th! In honor of the new shop we now have a Facebook Fan Page. Each new fan we get on the page between now and Monday, Feb. 21st will be entered into a drawing. One person will win a custom Sweet As Steel prize pack! Check out the page and get yourself into the drawing! Good luck everyone!

Wednesday, February 9, 2011

I am not above begging....


:) I entered my two girlie's into a model search for an amazing web store. I am hoping that I can get as many of my lovely virtual friends as possible to vote for them. So I am going to post it here and beg all of my readers to do the same. All you have to do is visit the Your Sparkle Box Boutique facebook page, like the page, and then like my daughter's pictures. PLEASE! LOL Also while you are there check out her amazing handmade products! She sells things for infants to adults. Her stuff is gorgeous! Thanks everyone!

These are the pictures posted:
             

Sunday, February 6, 2011

Button Rings!

These are so fun and super easy to make!

 Supplies:
2-3 buttons various sizes
Embellishments: I am using a feather and a rhinestone
Glue (hot glue, e6000, glue dots)
1 ring blank
 Start with the ring blank and put a dab of glue on it.

 Attach the ring blank to the back of your largest button.
 Grab a smaller button and add a dab of glue to it.

 Attach it to the larger button. You can center it or have it off to the side.
 Put some glue on the top of that same button and attach your feather.

 Put a little bit of glue onto your rhinestone (or a small button)
 Attach the rhinestone to the top. Making sure to cover the end of the feather.
And here is your finished, one of a kind, totally unique little ring!

Hoops!

So about a year ago I decided I would try hooping as a way to get more in shape and in all honesty just to have a little fun. I got all my supplies and made myself and 2 of my kids hoops. Last year was full of so much craziness I never really got into hooping. But recently i got a fire under my butt and decided I am going to dedicate 30 minutes a day to my hoop. Well after a couple day I realized that my hoop I made last year was just too big for me. it wasn't spinning as fast as i wanted. So this  week I made myself two new hoops. And I LOVE them! This is turning into a bit of an obsession for me hehe. I haven't started learning any tricks, right now I am working on the basics and trying to just get a feel for the movements and gain some muscle memory. It is my hope that over the next year I will improve and begin to nail a trick one at a time. Anyway I wanted to share my two new hoops.
 This one is so fun. The white under layer is actually glow in the dark tape. I love it!
 This one is my zebra hoop. The zebra print is actually ribbon, rather then tape. Just something different. I think it turned out pretty cute!

Sprinkle Filled Resin Pendants


Supplies:
2 part resin, I use Envirotex Lite (Got it at Michaels)
A container to mix the resin in (it will not be usable for anything else afterwards)
Something to stir with, I like popcicle sticks because they are cheap.
Sprinkles
Molds (I use silicon ice cube trays)
Glue such as e600
A necklace bail
a necklace of sorts
An empty box
a straw

Most importantly a warm work area!
First mix your resin according to the directions. Mine takes two equal parts mixed well. I like to mix small amount at a time to be sure it doesn't set up too quickly on me.


 Don't worry about the tiny bubbles we'll get rid of them later.
Pour a small amount of resin into your mold. Just enough to cover the bottom.
 Let it sit for 5-10 minutes or so just to thicken up a bit.
 Next pour sprinkles into your mold.
This is what it looked like once the tray was filled with sprinkles 


Pour resin over the top of the sprinkles. You don't need to totally fill the mold. but you want to be sure they sprinkles are covered.


  Cover the mold with a box for 5-10 minutes. The box keeps the wet resin protected from dust, little fingers, etc.
Come back to your molds and check them, many times bubbles form on the surface. Take your straw and lightly blow on the surface of the resin. The bubbles should start to pop. If you have larger ones that wont pop with the straw, use a pin to pop them.


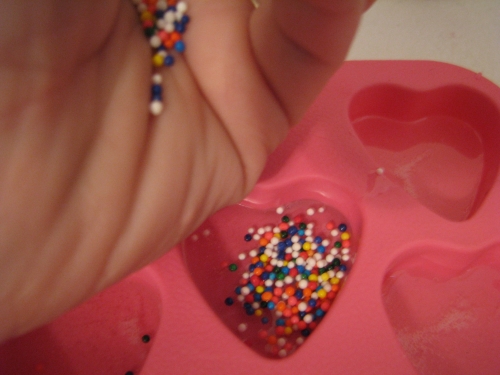
Now set the mold back under the box and leave it alone until tomorrow! Now be sure your work area is warm. If it it so cool the resin will not set clear, it will be foggy. My resin instructions recommend the temperature being between 70 and 80 degrees.


 Day 2!

We are going to first pop the resin from the molds.

 They should look something like this.


 If you have some jagged edges or some wispy edges, just take a low grit sand paper to those areas.
 Put a dab of glue onto your bail.
 Attach the bail to the back of your resin.


Once dry place the pendant onto your necklace.
There you have it! a fun and funky necklace!!